
Plain denim can sometimes get a little boring. Although having a staple plain pair of denim jeans is essential in your wardrobe. I decided to Distress a pair of my own. I've always known how to distress jeans but never really felt to do it until now because i just bought distressed denim from Stores. I had a lot of jeans which i don't wear any more because of the fit of them. I simply took them to my dry cleaners and took them in along the calves for a skinnier fit.
Distressing your own denim is a perfect way to make your clothes exclusive as no one will have the same pair as you. You can also choose how many rips and slits you want in your jeans. It's all personal preference.
So here's how i done it!!
Be sure to try it out and Tweet me your final products on my twitter @shamickedmond
P.S Excuse my PJ's haha

What you will need:
A pen/ Pencil ( preferably pencil so it washes out easily)
A pair of tweezers
a pair of sharp scissors
Additional: Sand paper.

STEP 1: You need to try your jeans on. With your pencil mark where you want your rips/ Lines to be. This will give you an exact idea of how they will look. Make the lines 2 cm apart as it makes it easier to pull the threads out. Adding extra lines to the top or bottom means you'll have a longer/ larger rip. Taking lines away means you'll have a shorter/ smaller rip.

Step 2: You want to stagger the lines slightly. So do two identical lines and the middle one slightly shorter or longer. This will give it a more effective and distressed look. (I will explain more about this towards the end of the tutorial)

Step 3: Pinch your jeans so the fabric raises and start to make a small hole with your scissors. Don't cut directly along the line when you're pinching as this might make a longer cut than you need.

Step 4: You then use your scissors to cut along the line and make it longer This takes away the risk of over cutting.

Step 5: As you can see i have cut my lines and i'm pretty much ready to start forming my holes.

Step 6: You will now need to get your tweezers and run them along the cuts just to expose the blue threads. You'll find that when you're pulling out the threads you'll pull on the blue ones out and white threads are exposed.

Step 7. Start pulling out the blue threads it may be a little tough to get out at first but once you pull a couple of the threads out the rest come out pretty easily.

step 8: I have a technique where i place my finger under a whole and stretch out the denim and little. This just makes it Easier to access the threads and they come out easier.

Step 9: I've finished my first whole. You should now work on the other side to pull out the threads opposite the middle cut.

Step 10: Place your finger underneath the leg whole and stretch the denim to help you separate the fibres. Pull out the threads, they should come out pretty easily by this stage.

Step 11: I'M DONE! well not quite. lol. To make your rips a little more authentic and aged slightly pull on the threads and surrounding area. Be careful not to rip the threads.

Step 12: Put your jeans in the washing machine. If not just soak them in Hot water for about 20 minutes to loosen the fibres. This will allow the edges of the hole to fray.
)You can also get creative with some Bleach and add some bleach marks on your jeans. This step should be done before you put them in the Washing machine).

Step 13: My denim is still wet. As you can see the edges have frayed nicely. I took my tweezers and frayed the edges a little more by rubbing it along the edges. I also used sand paper on my jeans. to distress it further.
Don't be alarmed by any of the white threads that have been ripped. This adds age to your holes and looks even more authentic.

Final look! This is roughly how your hole should look. Every whole will look different because of the way the fibres are thread to make the jeans. Nice right?
How they look on:
For my first time I opted for minimal rips and wanted smaller ones. Also your rips and holes will get bigger the more you wear your jeans. So take that into account when deciding how big you want your holes.


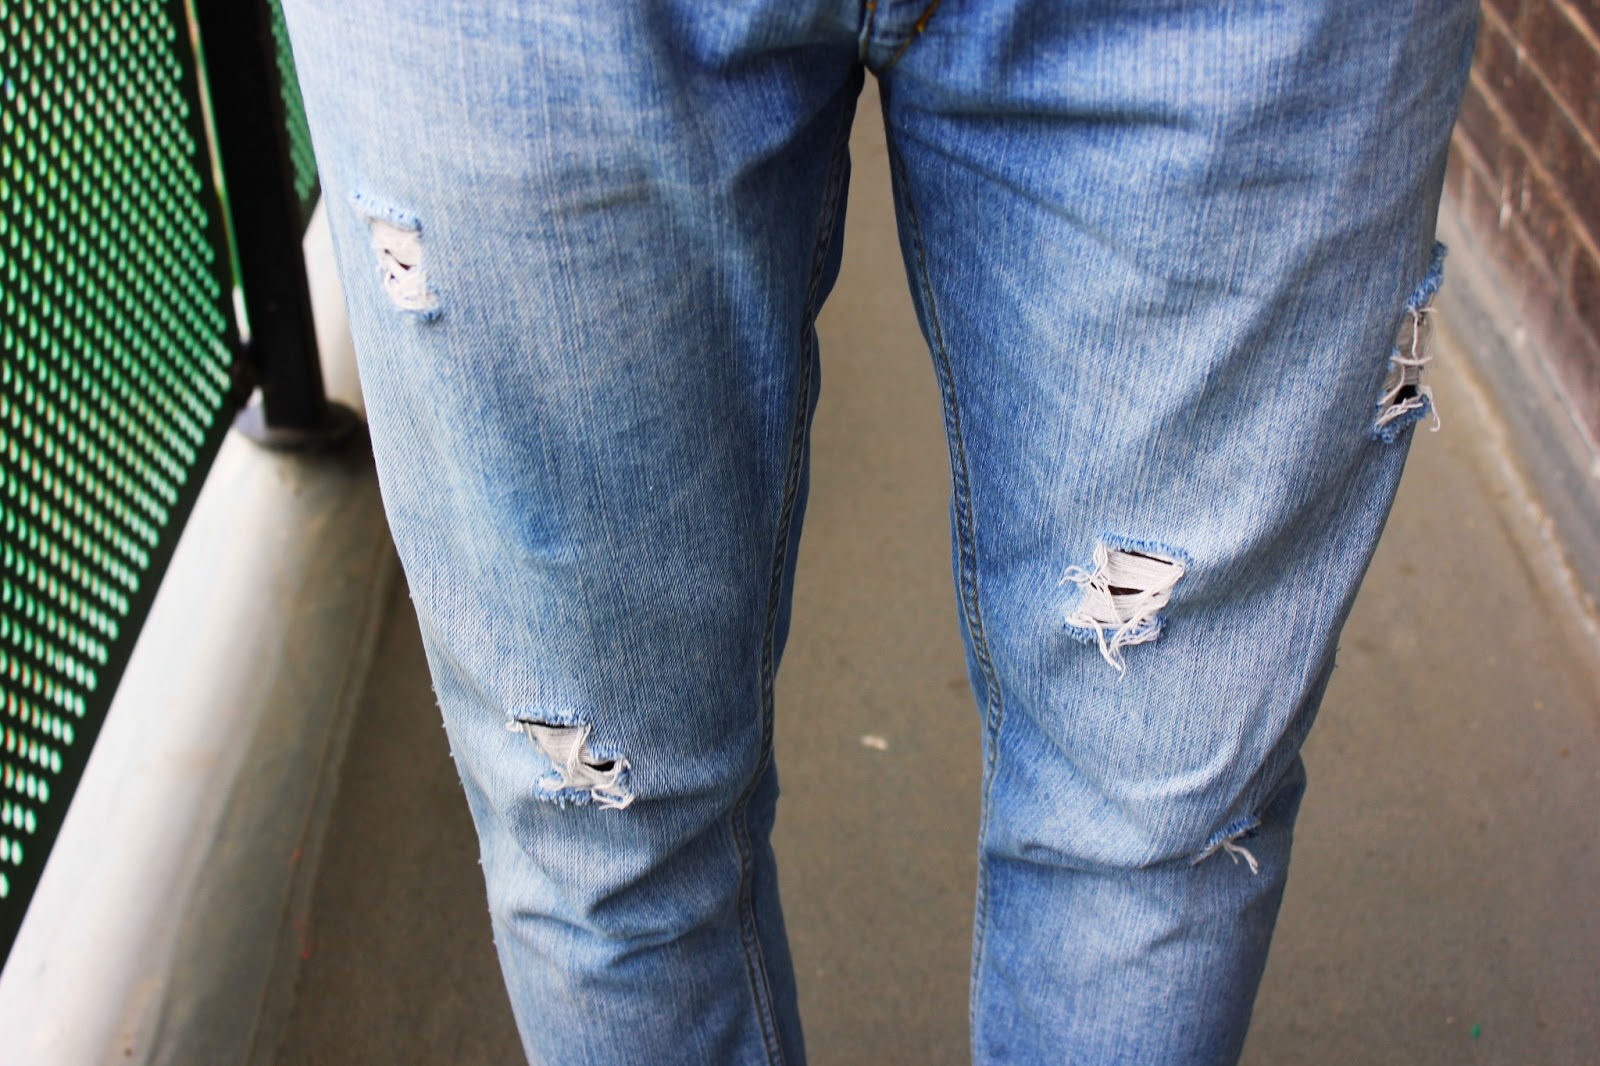
(Explanation of Step 2: As you can see the rip on the top left and top right are straight on the ages. The lower rips are all staggered. I like this effect as it gives a less uniformed look because of the different styles of holes)

On this picture you can see some distressing that i achieved using my sand paper. Just on the middle of my left thigh there's a darker area. For this look you can rub sandpaper anywhere on your jeans. It's extremely easy.
Thanks for Reading guys. I hope you all found this very helpful. A Blog post on how i style my jeans will be up around LCM.
No comments:
Post a Comment